Showing posts with label Techniques. Show all posts

Saturday, June 13, 2009

Floating Watercolouring (aka watercolouring for idiots!)

OLYMPUS DIGITAL CAMERA


Yep – that’s what it’s known as… watercolouring for idiots, or fool-proof watercolouring.  I can tell you that everyone can make this watercolouring look amazing!   It’s really fun to do, and the outcome is stunning.  This was another of the cards we made at our recent technique class.  It was inspired by a card done by Marelle Taylor using this same technique. 

supplies logo for blog

Stamp Sets : Fifth Avenue Floral, A Rose is a Rose.  Cardstock/Ink : Basic Gray, (hmmm… that reminds me… tomorrow is Gray’s Anatomy – YAY!), Pink Pirouette, Riding Hood Red, Kiwi Kiss, Old Olive.  Accessories : White EP, Versamark, Taffeta Ribbon, Hodge Podge, Eyelet Border Punch, Stamp-A-Ma-Jig, Sponges, Aqua Painter, Re-inkers (Pink Pirouette, Pretty in Pink, Rose Red, Riding Hood Red).


Whew – that seems a lot of stuff just for one card – but it sure was fun!   Well, we have survived our busy day, with one game of hockey cancelled which made it easier.  Just one more game of squash tomorrow, then I can rest my weary body.  Hope that the girl I played today is feeling just a little tired as well!

Have a wonderful night.

Michelle

Wednesday, June 10, 2009

The brayer is BACK!

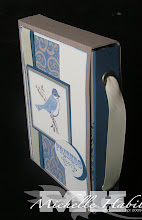
Good morning!   I’ve been busy stampin’ my heart out for classes and stamp club this week, which means I have had little time to blog.  I’ve also been finishing my new version of the Sliding Stationery Box which will be available for you by Friday.  We are also having another class for the Stationery Box because I know lots of you have been drooling over it when you see it!   The class will be Wednesday 1st July eithet 7pm or 9.30am, and will be $25 (or $15 if you make a $50+ order on the night). There are two choices of design – Bella Bleu or Raspberry Tart.  Limited number of each kit, so register early to get your first choice. 

I thought I’d quickly post a card that we made at Technique class last week for you before I race the kids to school before my Stamp Club arrive at 9.30.

OLYMPUS DIGITAL CAMERA

This card was based on a similar one done by Roz Blignaught which I received at convention for a swap.   If you would like to make some of these cards with a group of your friends then let me know – ANYONE can make cards such as these with a little guidance.

supplies logo for blog

Stamp Set : Upsy Daisy.  Cardstock/Ink : Brilliant Blue, Lovely Lilac, Pink Passion, Black Staz-On, Versamark. Accessories : Grosgrain Ribbon, Glossy cardstock, Brayer, Scallop Edge Punch.


Have a fabulous day!

Michelle

Thursday, June 4, 2009

The new improved version!

Hi there!  Hope you day is as gorgeous as ours is here in Taranaki!   A beautiful sunny, crisp day, and the mountain just looks AMAZING!   Must take my camera and get a photo to post.   Here’s the new improved version of the bleaching card I mentioned yesterday.  Cool huh??!  

OLYMPUS DIGITAL CAMERA

supplies logo for blog

Stamp set : Inspired by Nature.   Cardstock/Ink : Chocolate Chip, Baja Breeze, Whisper White, Old Olive.  Accessories : Bleach, Baja Breeze Striped Grosgrain ribbon, cutter kit.


Michelle

Wednesday, June 3, 2009

Living with PASSION!

Good evening!   I’ve had a fabulous few days, with some classes that have been very cool.  Thanks mainly to the lovely ladies who have come along I must admit!   Tonight I had my second technique class for the week, and thanks to JACQUI'S wonderful idea, have come up with a slightly amended version of one of the cards.

This was the card I created to teach the bleaching technique – very simple, yet a great way to use your stamps with something most of us have in our laundry.  No special equipment needed, just make sure you clean your stamps well straight after using bleach on them.     I’ve just taken a photo of the “after” card, but the lighting is just shocking, so I’ll have to do that tomorrow for you!

OLYMPUS DIGITAL CAMERA

Have a go – just pour a little regular household bleach into a shallow container with a folded handi-towel on the bottom.  Make sure the handi-towel is soaked through but not drenched.  You don’t want puddles of bleach on the bottom.  Then stamp your desired stamp into the handi-towel as you would a stamp pad.   Check no drips are going to fall off on your card… (see above for what it looks like if you DON’T check!) and stamp directly onto your card.   Hey Presto – how easy is that!    First up - I must say my dentist is an absolute darling, and I highly recommend her, but today was just a one of THOSE days where not much went right to start with.   A word of advice… bleach is not so much fun to play with if you have it squirted into your mouth (diluted of course) just as you are inhaling.  My second trip to the dentist today resulted in a little drama with bleach choking me when I inhaled at the wrong time… NOT a pleasant visit today I’m afraid.  Bleach, pain AND a numb tongue that stopped me from enjoying my muffin at lunchtime.  NOT good at all!   Guess it can only get better from here huh?   Until I get the bill at the end that is.   Ho hum.  The fun things we get to spend our money on.   Just imagine how many pairs of shoes I could buy for the same price as a root canal… imagine!   NO,  I’m not even going there.  I won’t sleep tonight otherwise.  Shoes are over-rated.  Right??  

Thanks for hanging around!

Have a fabulous night.

Michelle

Saturday, April 25, 2009

Masking 101

Good afternoon!   I hope your day was as fabulous as mine has been…  creating three fabulous projects in one day gives you a real feeling of achievement.   Thank you to everyone who was involved – it was a great day!   You’ll have to wait to see photos of our projects another day, but in the meantime, here’s a card that I made this week – it was actually a technique tutorial I was asked to do that is not needed anymore, so if you want to know how to create this card in a step-by-step, photographed tutorial, then just leave me a comment with your email address and – I’ll email it out to you.   It’s kind of a little bit too much information to post on here, and I’m trying to get my head around linking to a document… somehow…  Anyway – I gave this to my DH for his birthday which was on Wednesday.    It’s a great card for a man.  I did think about putting the whole family on the front of the card, or me driving… but in the end I just left it empty.

OLYMPUS DIGITAL CAMERA

Well, I’m a little weary, so I think it will be a lovely quiet night tonight, before I attempt to do my swaps tomorrow for convention – YAY!!

Thanks for stopping by!

Michelle

Tuesday, October 7, 2008

Black Magic

PA060015This is a card we made at Tracey's workshop recently.  Black Magic - that's the name of this technique, using white craft ink, a white gel pen and watercolour pencils.    First I stamped the flower from Blooming With Beauty with white craft ink, then I coloured it using the watercolour pencils (which I LOVE)!  After that, I used the white gel pen to highlight different parts of the flower & leaves.  Cool huh??   HUGE thanks to Kim Richards who made these cool cards a while ago, and showed us all how to do it! 

RECIPE : Stamp sets: Blooming with Beauty, Season Of Joy, One of a Kind.  Cardstock/Ink:  Real Red, Basic Black, Whisper White, White Craft Ink, Versamark.  Accessories: Gold EP, White Gel Pen, Watercolour Pencils

If you would like a workshop or a "Class On The Go" at your home, (or mine) give me a call, and you can have fun making some cards with your friends as well!

BTW - I have a half finished stationery box that I had fun  making at Cherie's last night that I'm really really hoping to finish today!  I will post it for you all as soon as I complete it. 

Michelle